目标平台: Windows 10 amd64
使用静态链接方式,原因:动态链接库太大了,包含很多本次实验不需要的函数
git clone https://github.com/OpenSSL/OpenSSL.git
或者从官网 https://www.OpenSSL.org/source/ 下载源代码
我使用的是OpenSSL 1.1.1
https://www.activestate.com/products/perl/
https://www.nasm.us/
将刚刚安装的nasm和perl的bin目录加入PATH

使用visual studio自带的命令提示工具初始化环境,因为需要使用nmake


cd进入OpenSSL源码目录
执行 perl Configure VC-WIN64A no-asm no-shared --prefix="D:\Project\OpenSSLwork\OpenSSL\build" --OpenSSLdir="D:\Project\OpenSSLwork\OpenSSL\build\ssl"
1
2
3
| nmake
nmake test
nmake install
|
此时已经有了我们需要的头文件和静态链接lib库


vs创建空项目,然后配置头文件和库文件的路径
项目右键-属性,配置选择所有配置,平台选择x64
VC++ 目录 配置里面的 包含目录 添加OpenSSL的头文件目录, 我这里是 D:\Project\OpenSSLwork\OpenSSL\build\include;

链接器 里面的 输入 的 附加依赖项 添加 静态库名,libcrypto.lib;libssl.lib;
注意:在使用OpenSSL的静态链接库时,除了添加 libcrypto.lib;libssl.lib;,还需要添加系统的依赖库:crypt32.lib;WS2_32.lib;, 因为OpenSSL在windows平台使用了这些库。
完整的: kernel32.lib;user32.lib;gdi32.lib;winspool.lib;comdlg32.lib;advapi32.lib;shell32.lib;ole32.lib;oleaut32.lib;uuid.lib;odbc32.lib;odbccp32.lib;%(AdditionalDependencies);crypt32.lib;libcrypto.lib;libssl.lib;WS2_32.lib;
因为需要md5,rsa,Base64等操作,这里需要导入OpenSSL四个相关的头文件
1
2
3
4
| #include <OpenSSL/rsa.h>
#include <OpenSSL/pem.h>
#include <OpenSSL/md5.h>
#include <OpenSSL/bio.h>
|
1
2
3
4
5
6
7
8
| int md5_hash(const char *in, unsigned char *md)
{
unsigned char* data;
const unsigned char* str;
data = (unsigned char*)in;
MD5(data, strlen(in), md); //调用OpenSSL的md5方法
return 1;
}
|
 1
 2
 3
 4
 5
 6
 7
 8
 9
10
11
12
13
14
15
16
17
18
19
| RSA * gen_rsa()
{
int bits = 1024;
RSA* rsa = RSA_new();
BIGNUM* e = BN_new();
BN_set_word(e, RSA_F4);
int rc = RSA_generate_key_ex(rsa, bits, e, NULL); //OpenSSL中生成rsa key的新方法
BN_free(e);
if (rc != 1) return NULL;
size_t pri_len;
size_t pub_len;
char* pri_key = NULL;
char* pub_key = NULL;
BIO* pubkey = BIO_new_file("public.pem", "w");
BIO* prikey = BIO_new_file("private.pem", "w");
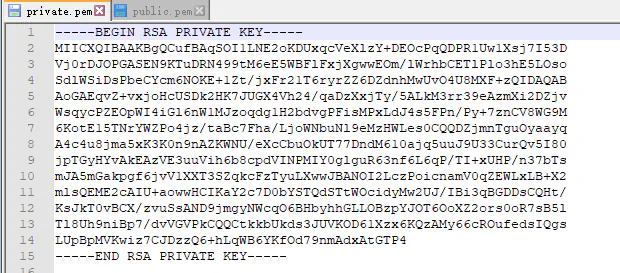
PEM_write_bio_RSAPrivateKey(prikey, rsa, NULL, NULL, 0, NULL, NULL); //私钥写入文件
PEM_write_bio_RSAPublicKey(pubkey, rsa); //公钥写入文件
return rsa;
}
|
 1
 2
 3
 4
 5
 6
 7
 8
 9
10
11
12
13
14
15
16
17
| int Base64_encode(const unsigned char* buffer, size_t length, char** b64text) {
BIO* bio, * b64;
BUF_MEM* bufferPtr;
b64 = BIO_new(BIO_f_Base64());
bio = BIO_new(BIO_s_mem());
bio = BIO_push(b64, bio);
BIO_set_flags(bio, BIO_FLAGS_Base64_NO_NL);
BIO_write(bio, buffer, length);
BIO_flush(bio);
BIO_get_mem_ptr(bio, &bufferPtr);
BIO_set_close(bio, BIO_NOCLOSE);
*b64text = (char*)malloc((bufferPtr->length + 1) * sizeof(char));
memcpy(*b64text, bufferPtr->data, bufferPtr->length);
(*b64text)[bufferPtr->length] = '\0';
BIO_free_all(bio);
return 0;
}
|
 1
 2
 3
 4
 5
 6
 7
 8
 9
10
11
12
13
14
15
16
17
18
19
20
21
22
23
24
25
26
| int main(int argc, char* argv[])
{
if (argc < 2)
{
printf("usage: work.exe \"string to hash and sign\"");
return 0;
}
char* str = argv[1];
printf("your str: %s\n", str);
// first md5(str)
unsigned char md[MD5_DIGEST_LENGTH];
md5_hash(str, md);
// then gen rsa pkey and sign the md
RSA* rsa = gen_rsa();
unsigned char* sig = new unsigned char;
unsigned int siglen;
RSA_sign(NID_sha1, md, MD5_DIGEST_LENGTH, sig, &siglen, rsa);
// final Base64(sig)
char* b64text;
Base64_encode(sig, (size_t)siglen, &b64text);
printf("%s\n", b64text);
return 0;
}
|
因为是课程作业,就没有对出现的错误情况进行处理,实际使用时需要考虑到


